
There’s a lot of fancy-ass BBQs and grills out there, but you can’t spend your way into good BBQ. With a basic big Weber, you can do a lot of great BBQ. This little article will go over the basic Weber, and the basic tools you can use to elevate your backyard BBQ and Smoking to new heights.
Here it is. This is the champ. This is what your dad used, this is what your granpappy used. There’s a reason: It works great.
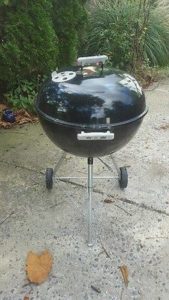
I got mine for free off the local classifieds. Free, that’s FREE.99. You can find these all over the place for free every fall when it starts getting cold. Or they usually appear all year pretty cheap around $25.
Now the little rickety grates are usually shot to hell or nasty with old bbq schmeg. Since you got the best BBQ for free, you can afford to get this awesome set of cast-iron grates to replace them:
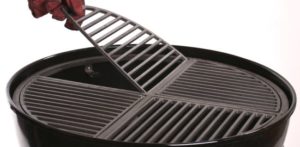
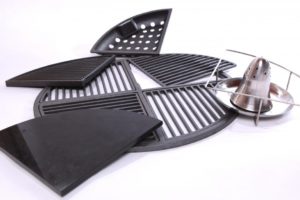
You can get all sorts of little sections with a flat griddle, veggie basket, etc.. These will add a wide variety of capability to your Weber.
The next thing you will need is a charcoal Chimney. You can light your briquettes with a few scraps of paper, no fluid needed. Just pile in your charcoal, light the paper in the bottom of the chimney, 5-10 minutes later: perfectly started charcoal. You can add some olive oil to the paper to make it burn hotter and longer if needed to get your charcoal lit.

Now this is where it gets fancy. The hardest thing to do when BBQing or smoking is keeping the temperature monitored or stable. This is the tool you need to keep an eye on your temps without hovering over the BBQ all day. I smoke a lot on my Weber so I need a steady temperature for 3 or more hours. With this sweet little WIRELESS temperature gauge, you can keep an eye on the temperature of the BBQ AND the internal temperature of the meat so you know exactly when it is done! It has alarms to let you know if the BBQ gets too hot, cold, and you can set the alarm for the meat temp too. Put one probe in the grill area, one into the meat. Adjust your BBQ vents to get the heat where it needs to be, and just let it go. These easliy work a couple hundred feet or more, so you can shuffle around with an ice cold drink while you BBQ or smoke.

The last thing I’m going to recommend is the vortex! this is a thick metal cone that you use to position your briquettes in the BBQ. You can put the coals in the middle, meat on the outside, vice versa, put them both in the middle for a fast sear, or put them off to the side, it makes controlling the heat application to your food very easy! They come in a few sizes, so be sure to order the proper size for your particular Weber. (S, M, L, XL). Check their website out here: http://vortexbbq.com/

Here’s how I do my chicken legs …. Vortex, charcoal and mesquite chunks for smoke in the middle, legs all around the outside so they don’t get direct heat and dry out, Wireless monitor to let me know when they are done, and they are always perfect.

With these tools and your free Weber, you should only be about $250 in the hole but don’t let the wife beat you up over it. When she sinks her teeth into the perfect Q you are putting out, all will be forgiven.
1 thought on “Basic awesome Weber BBQ Grill setup”
Comments are closed.