Spring is here and time to get out the Terra Cotta smoker, but I wanted some sort of automatic control for the temperature. With this nifty little electronic monitor and controller you can make your dumb smoker a smart smoker and keep the temperature exactly where you want it. It will work with any plug-in electric smoker or BBQ. You cut up an extension cord, place this controller inline to the smoker power, set it and forget it! Here’s the shopping list:
Hammond 1591ESBK ABS Project Box Black
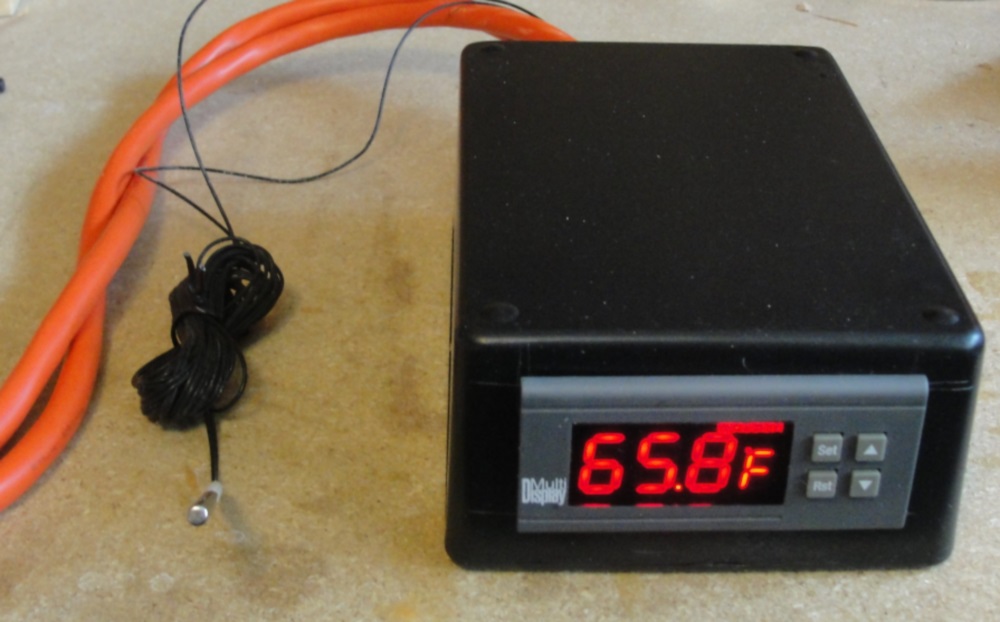
I chose the DN300A from Thermomart because it has a F range from -22 to 575. There are other similar controllers on the market that top out at 212 the but I wanted the extra range just in case I’m cooking hotter and faster. The only drawback are the leads to the sensor which you have to keep from melting, so keep them off the actual smoker. Some thermo-insulation should do to prevent accidents with that. I will try and find a thermo-resistant sensor later. The hardest part about the programming the unit is understanding to directions provided by someone that doesn’t speak native English. The unit uses a built-in relay to cycle power to the smoker based on the minimum and maximum values you enter. (Save an hour of frustration by setting it to H for Heat, from C for cool, first). Once setup you can apply power to your heating element based on the temperature of the probe!
Step 1: Cut a hole in the end of your project box for your controller. Remove the orange clips used to hold the unit in place and give it a test fit. 71x29mm does fine:
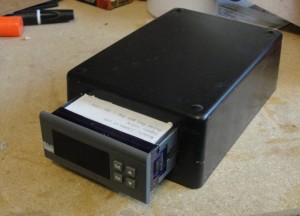
Cut another hole in the opposite end to run both ends of the extension cord through.
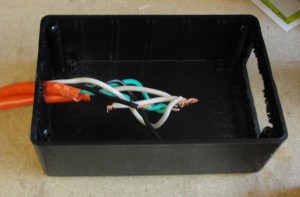
Here’s how the wiring goes together for the controller. I ran the wiring through the larger controller hole then slid them all back into place once connected. remove the little cover on the rear of the controller and make the connections.
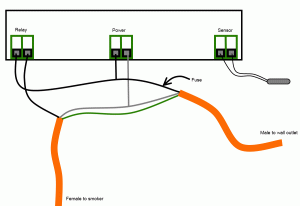
Slide everything all back into place. Picture shows the rear controller cover back in place.

Secure the little sensor wires with the wire tie downs so you don’t accidentally pull them out. A couple loops tied with a zip tie should to it.
Slide the little orange clips back onto the controller body to hold the unit into the project box.
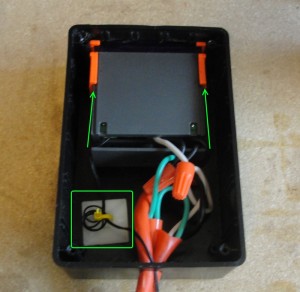
Button up the bottom of the controller box and get ready to program!
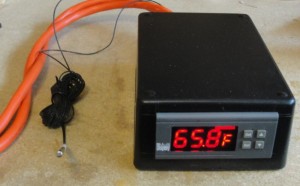
I placed my sensor bulb in the little gap in the ends of my smoker gasket. I’m leaving the sensor for the other thermometer to see how close/accurate they two are. Once I find a heat resistant one for the DN300 Ill replace them both.
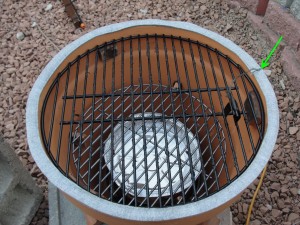
So far the DN300A has a lot of good features:
- You can calibrate the temperature 9 degrees each direction to make sure it’s where it needs to be.
- It has too hot and too cold audible alarms.
- Has a 0-999 minute timer.
- Switch between C/F
- High temperature limit of 572F
- Adjustable hysteresis from 1-30 degrees.
- Fast response from the sensor.
- Total cost, about $50
I have been testing it out on the terra cotta and brinkman electric smoker all day and it’s cycling power perfectly to keep the temps perfect for smoking!
I used some spare nomex strip to make a protective sleeve for the sensor wires. Punch a hole in the middle of the strip, then remove the sticky side and fold it together to cover the first few inches of the wires. The brinkman I’m testing this on has a little gap around the top lid so it fits right in and doesn’t expose the wires to direct heat and keeps the leads from melting on the metal.
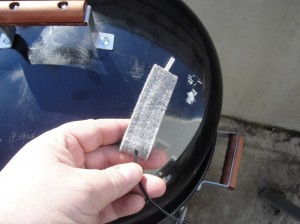
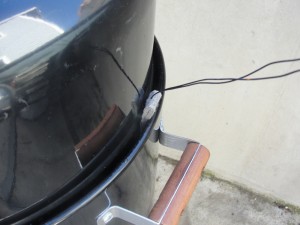
This SHOULD work perfectly for a charcoal smoker by powering a little fan to blow into the charcoal. I will make up and test a charcoal version next using a 12V wall wart to run a little computer case fan to add flow to the charcoal to raise their temperature too. It should have the same good results.
Could you please provide some specifics on the fuse used in this project?
BTW – excellent post! Thanks for the “how-to” with photo’s
a 15A 120V fuse should do. I have this plugged into a 20 amp circuit.
so will this set up plug into a heat element from any electric smoker. Mine shot craps and am looking to replace controls but keep heat element. Any suggestions?
Mike
Should work fine with any electric heating element!
how many amps is this controller good for my smoker pulls 15 amps
10 amps according to the tech stuff on the controller’s website. Make 2?
On the same website there is a model DIN300A-BBQ-30A. That has a built-in 30A relay which will be able to handle the load.
where did you get your temperature sensor from?
It comes with the controller listed in the article.
he best electric smoker is always the one meeting your smoked cooking needs just in a way you like. Consistent smoke, even temperature, remote control and portable smokehouse in affordable price will surely be your demand. Certainly, no one likes comprising on quality and durability.
Have you used the timer function? If so, is it easy to set, and does it keep the output power off after reaching 0?
I have not used the timer
Your unit shows the temp in F. while the one on the website shows the temp in C. I can make a note for conversion. having it in F would be easier. Has the model changed or was yours a different model than the one linked? I am going to use this to control a fan attached to the firebox on a custom home made smoker.
I use F too, it does both.
This may be simpler than I realize, but how did you connect the fan to the controller? Is just a matter of using the relay connection to power the fan rather than powering the smoker?
Yes, exactly!
I’ll try to use a DN300A for my electric smoker. It’s not so expensive. Thanks for this idea.
Get the one with the 30 amp relay built in if you need more than 10 amps.
I got a new smoker with an analog controller for the heating element. I want to set mine up with the DIN300A-BBQ-30A but was curious if you just plug the female end of the extension cord into the existing analog controller male plug and if so, do you just turn the analog controller to “high” and allow the digital controller apply power when needed?
That looks like it would be correct, this DIN300 controller looks like it has a more durable sensor too.
Wonderful tips, I should try to make one for my somoker, it is very interesting.
Unit was delivered a few days ago. have it built and functioning. IT shows C and F when it is powered on. but defaults to C. I don’t see in the instructions on how to change it.
NM, I got it. Hold the SET and UP for 3 seconds. CF to change. Testing with a glass of hot water and a lamp works great. cant wait for a weekend to fire up the smoker.
I used an extension cord, cut it in half. For a fan I used an cheap bathroom exhaust fan. These have a built in damper, and match up to common ductwork. Some aluminum dryer vent and a galvinized duct flange. Works fantastic. Now with 2 large custom vertical smokers all I need do is go out once an hour and add a stick to the firebox.
This is really useful. I will try this for my new indoor grill. Thanks a lot 🙂
Used a hair dryer as a blower to supply air to a rather large smoker and this controller set up to supply power. It is working perfectly. Let me know if anyone has any questions.
Am seeing temp controllers on Amazon for much cheaper. Even allowing for the temp probe, am seeing a $20 difference. Anyone tried the cheaper versions?
Aaaaand Never Mind! The cheaper versions all have temperature range problems. Should’ve researched before I asked.
Cool little temperature controller! Do you have any recommendations for a small centrifugal for use on an Akorn smoker grill? I am thinking 6.5 to CFM.. I would also prefer a Teflon insulated ss sheathed TC for my application.. Looks like this control will only work with an RTD.. RTD’s do some wacky things when they fail and would prefer a type J or K TC,, Thanks for the info!
I have tried lots of things for charcoal such as a computer case fan, a little hair dryer, just have to try and see what works best for your charcoaler.
Do you still use this temperature controller? I am curious if it held up over the years.
Yes I use it at least once a month!
Thank you for the reply. I plan on building a controller similar to this.
Thanks for the great info here. I have a few questions…
Is there a model with a 2nd probe for internal meat temperature?
If not, a 2nd DN300A should do the trick and still keep the cost down (correct me if I’m wrong). Anyone done this?
Also, just to clarify, the relay just turns the fan ON or OFF…correct?
Thanks,
Randy
I built one of these based on your plans. (Pimping my Cheap offset smoker (COS)) Cooked the first rack tonight. Awesome directions! Thanks for your work here. While I don’t have a website, I can post pix if you’d like.
I did this as part of my larger project to turn the COS into a really useful smoker. Spent time and money sealing air leaks, measuring temperature inside the meat, as well as multiple points inside the cooking chamber, and controlling airflow.
Because my COS is charcoal/wood heated, I attached the controller to a thrift store blow dryer after I killed the power adaptor for a computer fan. Glad that I did. The 3 – setting air flow switch is pretty useful. “Hi” for lighting the fuel, “Medium” or “Lo” for managing the fire/cooking temp once lit.
I also added angle-iron rails to mount nomex (lava lock) seals to close the cooking chamber. I installed a bit of dryer vent to lower the smokestack down to grill height. I used dryer vent to conduct air to the offset intake vent from the blow dryer.
Thanks again for the plans.