Category Archives: Tools

First run for my new ThermoWorks ChefAlarm!

The fine folks at ThermoWorks were kind enough to invite some local bloggers to tour their facility last month. I did not know their HQ was right up the road. They were kind enough to treat some local bloggers to a tour, educate us on the different types of thermometry devices were on the market and of course: served up some FINE pulled pork. The bottom line though, is that ThermoWorks takes thermometry seriously. Really seriously. Their onsite calibration and support lab is something I could not imagine made-in-china or bargain thermometer manufacturers have available.

I have been blogging and cooking all sorts of things, mostly using the least expensive thermometers and monitoring devices I can find. (I’m broke as a joke.) Results have been hit and miss. Things often come out overcooked even though I followed directions to the letter. I’ve found better results with meats once I learned about letting them rest after cooking, but still coming out overcooked in many cases.

I picked up a  ThermoPop and ChefAlarm while at ThermoWorks.  I gathered up the cheaper thermometers I had in the BBQ drawer from thermpro, Sharper image, Weber and a couple of those silver dial thermometers and checked them all in a ice bath and boiling water to check their accuracy.  They were all within 2 degrees of 32F for the ice bath but the boiling water showed a range varying 26 degrees between them. The ThermoPop and ChefAlarm were both dead on at 32 degrees in the ice bath, and read 204.3 and 204.4 respectively in boiling water. (I’m at ~4250 feet altitude). This is where the largest variance between the different thermometers was found. The silver mechanical dial thermometers were the farthest off, and the other digital thermometers ranged up to 19 degrees off of 204 degrees. With that kind of variance it’s easy to see how BBQ’d meats can go from decent to overcooked. Plus the ThermoWorks products read the temperatures far faster than any of them. This means you have your BBQ open for a shorter amount of time and the BBQ temperature recovers faster when you are done reading.

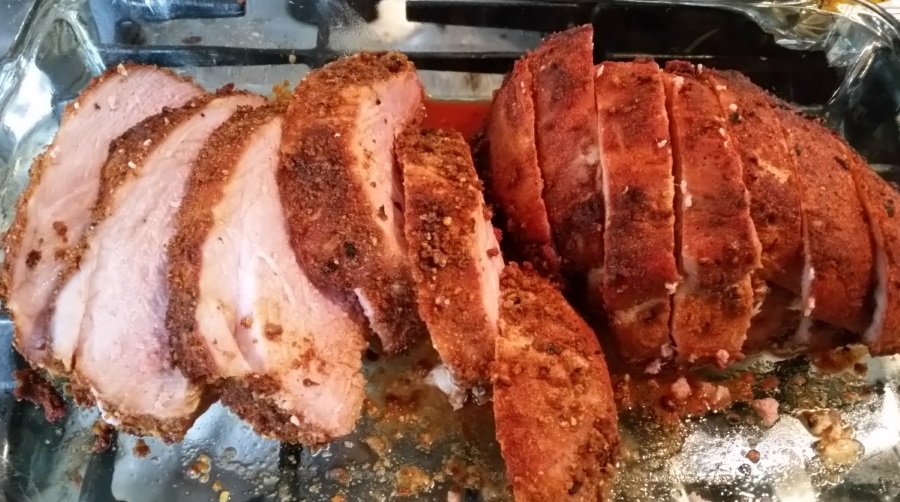
I did my first cook with the ChefAlarm on a couple of pork roasts, and set them for 140 with the BBQ temp ranging around 260-280. I used Tonguespank Applewood Chipotle rub on one, and Honey Habanero  rub on the other.

The audible alarm on the ChefAlarm can be adjusted pretty high, I could hear it across the street when it was done! I pulled the meats and had them rest in a glass pan and they continue to heat in the middle, up to 150, at which point we served it up. Delicious, tender and not overcooked. I’ll be cooking lots of meats that often wound up overcooked and see how much better accurate temperature readings change the results. The ThermoTorks thermometers will offset their cost by saving ruined BBQs.
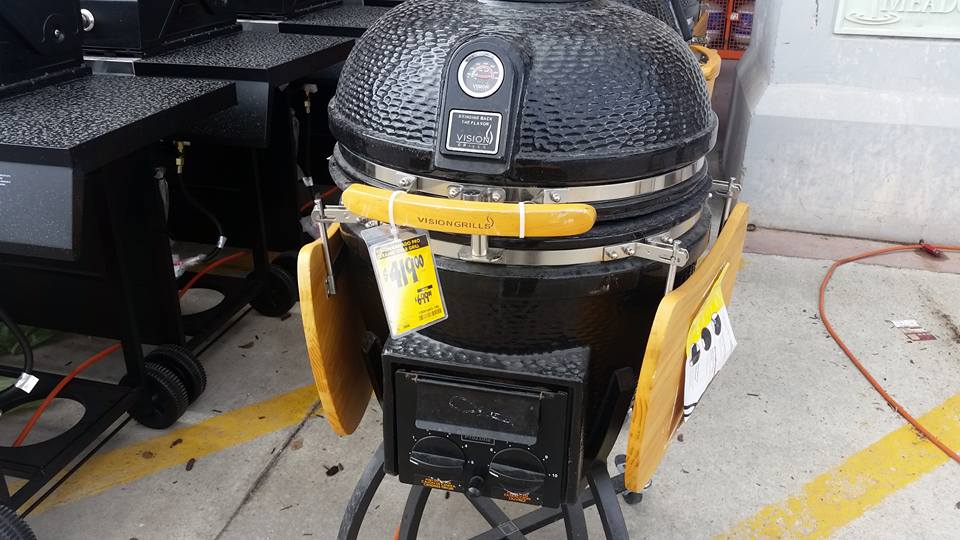
Couldnt’ resist: Vision Kamodo Grill !

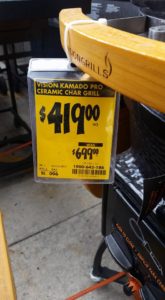
OK Home depot, you got me…a hot yellow clearance tag and 20% off for opening a card….this is now mine.

I have always wanted  big fat kamado grill but the Big Green Eggs are just too expensive. My little clay pot smoker did its best but just could not handle a brisket or multiple racks of ribs. Plus the Vision has a nifty pull-out ash pan, electric start and easy to top and bottom vents.
First up: Brisket.

Basic awesome Weber BBQ Grill setup

There’s a lot of fancy-ass BBQs and grills out there, but you can’t spend your way into good BBQ.  With a basic big Weber, you can do a lot of great BBQ. This little article will go over the basic Weber, and the basic tools you can use to elevate your backyard BBQ and Smoking to new heights.

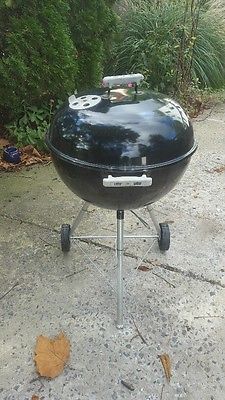
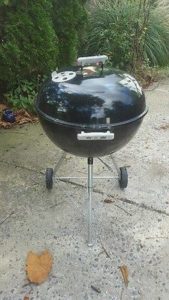
Here it is. This is the champ. This is what your dad used, this is what your granpappy used. There’s a reason: It works great.

weber2

I got mine for free off the local classifieds. Free, that’s FREE.99. You can find these all over the place for free every fall when it starts getting cold. Or they usually appear all year pretty cheap around $25.

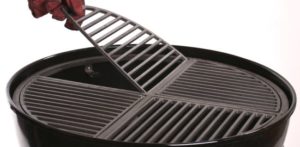
Now the little rickety grates are usually shot to hell or nasty with old bbq schmeg. Since you got the best BBQ for free, you can afford to get this awesome set of cast-iron grates to replace them:

cast-iron-grate1

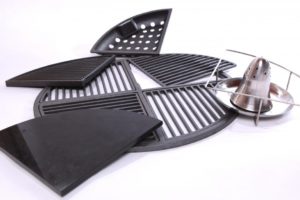
You can get all sorts of little sections with a flat griddle, veggie basket, etc..  These will add a wide variety of capability to your Weber.

gfd

The next thing you will need is a charcoal Chimney. You can light your briquettes with a few scraps of paper, no fluid needed. Just pile in your charcoal, light the paper in the bottom of the chimney, 5-10 minutes later: perfectly started charcoal. You can add some olive oil to the paper to make it burn hotter and longer if needed to get your charcoal lit.

Now this is where it gets fancy. The hardest thing to do when BBQing or smoking is keeping the temperature monitored or stable. This is the tool you need to keep an eye on your temps without hovering over the BBQ all day. I smoke a lot on my Weber so I need a steady temperature for 3 or more hours. With this sweet little WIRELESS temperature gauge, you can keep an eye on the temperature of the BBQ AND the internal temperature of the meat so you know exactly when it is done! It has alarms to let you know if the BBQ gets too hot, cold, and you can set the alarm for the meat temp too. Put one probe in the grill area, one into the meat. Adjust your BBQ vents to get the heat where it needs to be, and just let it go. These easliy work a couple hundred feet or more, so you can shuffle around with an ice cold drink while you BBQ or smoke.

The last thing I’m going to recommend is the vortex! this is a thick metal cone that you use to position your briquettes in the BBQ. You can put the coals in the middle, meat on the outside, vice versa, put them both in the middle for a fast sear, or put them off to the side, it makes controlling the heat application to your food very easy! They come in a few sizes, so be sure to order the proper size for your particular Weber. (S, M, L, XL). Check their website out here: http://vortexbbq.com/

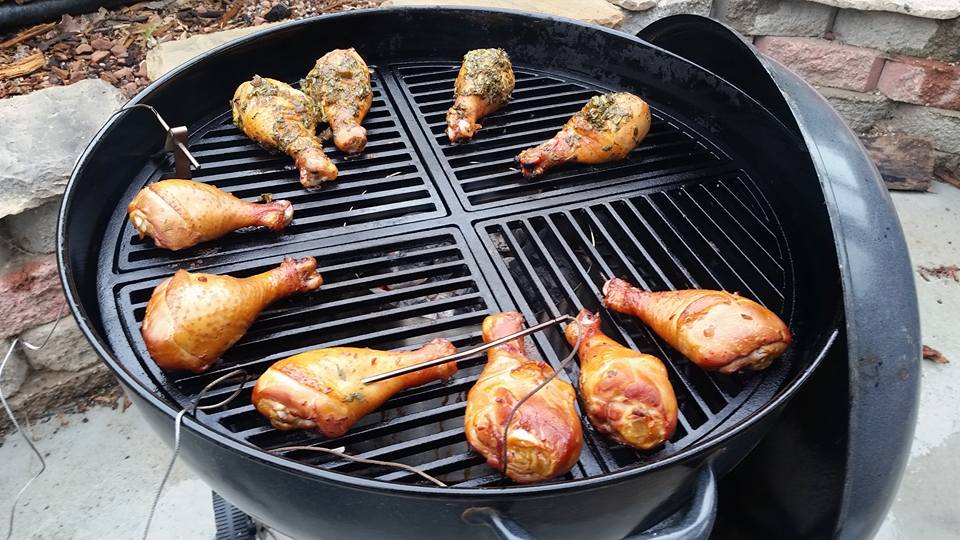
Here’s how I do my chicken legs …. Vortex, charcoal and mesquite chunks for smoke in the middle, legs all around the outside so they don’t get direct heat and dry out, Wireless monitor to let me know when they are done, and they are always perfect.

yb

With these tools and your free Weber, you should only be about $250 in the hole but don’t let the wife beat you up over it. When she sinks her teeth into the perfect Q you are putting out, all will be forgiven.

Ten great men’s Christmas cooking gift ideas

People keep asking me what I want and what they should get for their newly-cooking men for Christmas. Here’s a fast list of some mandatory basics all the way up to some nice expensive stuff.
31VN1W9JACL

Cast Iron Pan: Your dad cooked on one, your gran-pappy cooked on one when he wasn’t chasing Germans across France. Cast iron pans hold and distribute heat better than anything. You get it seasoned right and they are also super easy to clean. If you don’t have one yet you are wrong. I have a 10″, 8″ and 4″(just for making good egg sandwiches).

knives

A Decent Knife set. I don’t recommend going all gung-ho for a thousand dollar knife set as your first set. Your first knife set should be like your first guitar, gun or wife. Try one out that is decent and the more you use it and try it out the more you will find its shortcomings and benefits. Then when you get your next one, you know what to look for and keep it around a long time.

cuttingboard

Plastic PCB Cutting boards. Get a few of these and stop using your new fancy knives to cut right on your wife’s fancy-ass new granite counter tops and destrying your knives. Get ones with little troughs around the edge to keep all that tomato juice and blood off of the counters. One for meats, one for vegetables at least.

mandolin

Mandolin. No, NOT the kind of mandolin for unwashed renaissance-fair-minstrel-wannabees. A nice sturdy kitchen mandolin for making nice uniform sliced things faster than you can with your ginsu knives.

thermometer

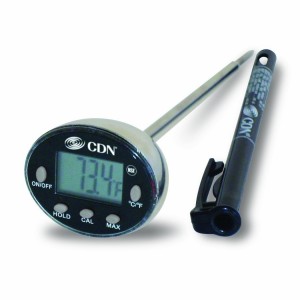
Instant read thermometer. Is it done yet? Is it done yet?  Is it done yet?  Is it done yet?  Is it done yet?  Is it done yet?

ts

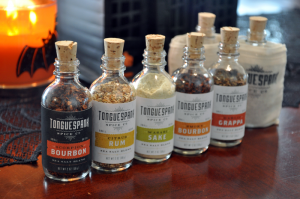
Tonguespank Liquor-infused HOT spices. These are my favorite hot spices and I use them on everything. Check their site out for lots of other super Christmas gifts like Liquor infusion kits and spicy salts!

bowls

Stainless mixing bowls.  Metal ones won’t melt or warp when you accidentally run them in a hot dishwasher load.

mat

Non stick BBQ grill mats. These are awesome. You have seen them on TV, and I love them. First of all they keep small veggies and kabobs from falling through the grate on your BBQ and you can grill right on top of them and nothing sticks to them. They even leave grill marks on your steak!

whiskeykit

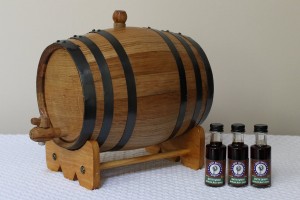
White oak barrel whisky making kit. That single dude with the tattoos and piercings next door that just moved here from Portland makes beer? So what, make whiskey like a man.

bambooboard

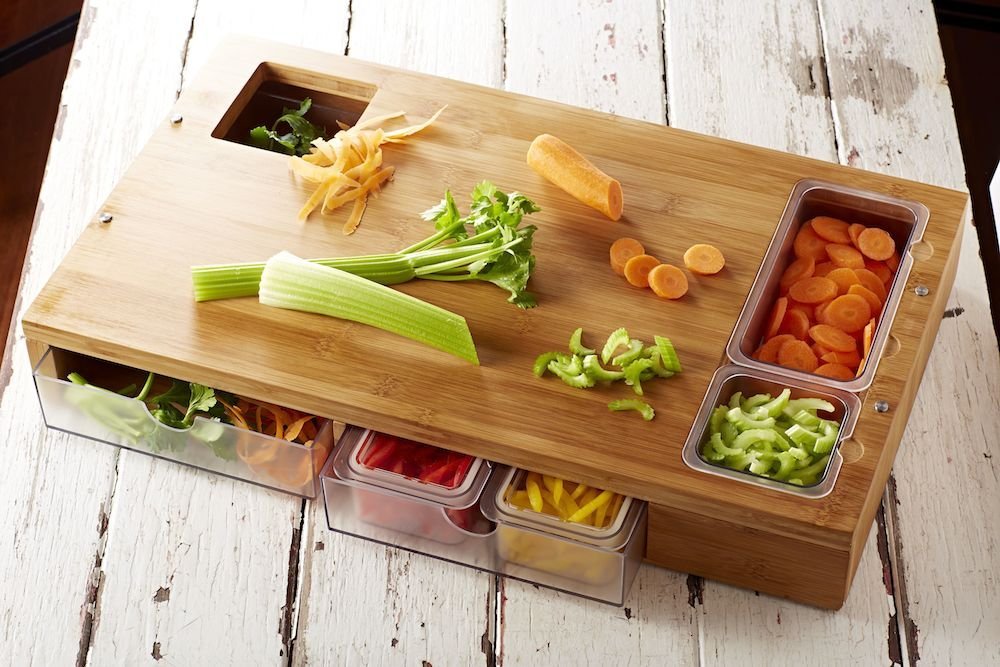
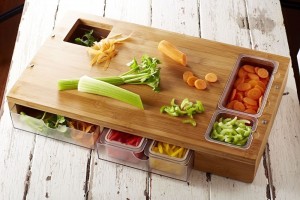
Bamboo Cutting board workbench. This is on my personal wish list. Little containers to store your cut veggies, a little area to scrape your garbage bits into and it fits on a small counter. This would be great for  small apartment kitchen chef.


How to make DIY cheap electric bbq or smoker controller

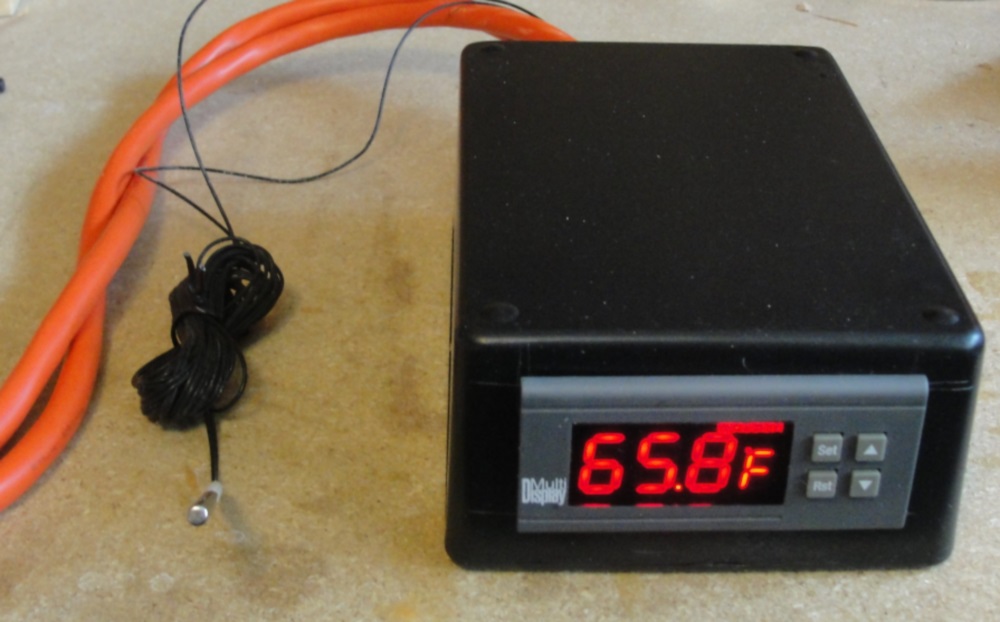
Spring is here and time to get out the Terra Cotta smoker, but I wanted some sort of automatic control for the temperature. With this nifty little electronic monitor and controller you can make your dumb smoker a smart smoker and keep the temperature exactly where you want it. It will work with any plug-in electric smoker or BBQ. You cut up an extension cord, place this controller inline to the smoker power, set it and forget it! Here’s the shopping list:

Extension cord

Hammond 1591ESBK ABS Project Box Black

DN300A temperature controller

I chose the DN300A from  Thermomart because it has a F range from -22 to 575. There are other similar controllers on the market that top out at 212  the but I wanted the extra range just in case I’m cooking hotter and faster. The only drawback are the leads to the sensor which you have to keep from melting, so keep them off the actual smoker. Some thermo-insulation should do to prevent accidents with that. I will try and find a thermo-resistant sensor later. The hardest part about the programming the unit is understanding to directions provided by someone that doesn’t speak native English. The unit uses a built-in relay to cycle power to the smoker based on the minimum and maximum values you enter. (Save an hour of frustration by setting it to H for Heat, from C for cool, first). Once setup you can apply power to your heating element based on the temperature of the probe!

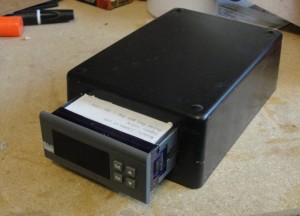
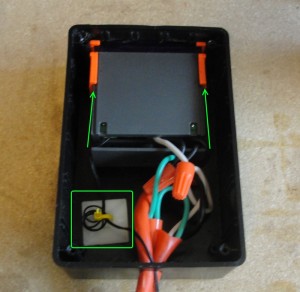
Step 1: Cut a hole in the end of your project box for your controller. Remove the orange clips used to hold the unit in place and give it a test fit. 71x29mm does fine:
bbq111

Cut another hole in the opposite end to run both ends of the extension cord through.
bbq113

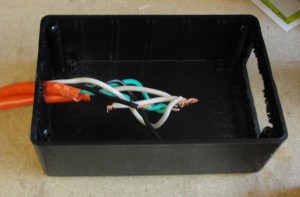
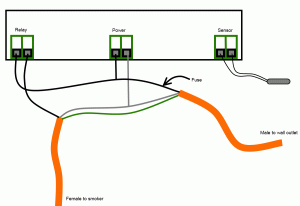
Here’s how the wiring goes together for the controller. I ran the wiring through the larger controller hole then slid them all back into place once connected. remove the little cover on the rear of the controller and make the connections.
wiring

Slide everything all back into place. Picture shows the rear controller cover back in place.
bbq1114

Secure the little sensor wires with the wire tie downs so you don’t accidentally pull them out. A couple loops tied with a zip tie should to it.
Slide the little orange clips back onto the controller body to hold the unit into the project box.
bbq115

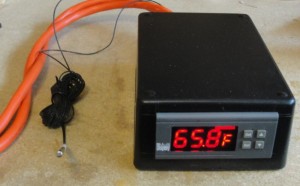
Button up the bottom of the controller box and get ready to program!
bbq1
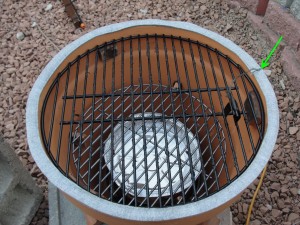
I placed my sensor bulb  in the little gap in the ends of my smoker gasket. I’m leaving the sensor for the other thermometer to see how close/accurate they two are. Once I find a heat resistant one for the DN300 Ill replace them both.
sensor2

So far the DN300A has a lot of good features:

  • You can calibrate the temperature 9 degrees each direction to make sure it’s where it needs to be.
  • It has too hot and too cold audible alarms.
  • Has a 0-999 minute timer.
  • Switch between C/F
  • High temperature limit of 572F
  • Adjustable hysteresis from 1-30 degrees.
  • Fast response from the sensor.
  • Total cost, about $50

I have been testing it out on the terra cotta and brinkman electric smoker all day and it’s cycling power perfectly to keep the temps perfect for smoking!
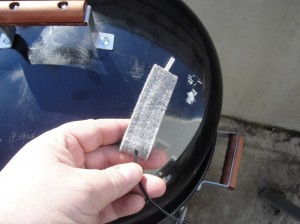
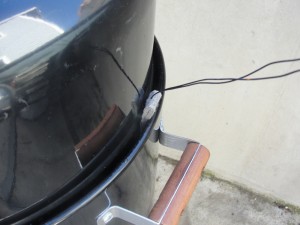
I used some spare nomex strip to make a protective sleeve for the sensor wires. Punch a hole in the middle of the strip, then remove the sticky side and fold it together to cover the first few inches of the wires. The brinkman I’m testing this on has a little gap around the top lid so it fits right in and doesn’t expose the wires to direct heat and keeps the leads from melting on the metal.
bbq4  bbq3
This SHOULD work perfectly for a charcoal smoker  by powering a little fan to blow into the charcoal. I will make up and test a charcoal version next using a 12V wall wart to run a little computer case fan to add flow to the charcoal to raise their temperature too. It should have the same good results.

Improved terracotta DIY smoker

Don’t get me wrong, the Alton Brown terracotta smoker is great. I’ve made a dozen or so batches of ribs and they all turn out great!

There are some slight improvements that make this a little better version than the first one I made but it will put you a bit over the $100 mark.

  • More cooking area
  • Better lid handling
  • Better temperature control

Here’s the list of stuff you will need:

So the first thing is: DON’T use a plain little $4 replacement generic thermometer. My first one was 25 degrees off of the correct digital reading and the 2 more I checked from Home depot had a mean difference of 40 degrees!

Second: Don’t wedge your grates into the walls of the pot. They get hot and expand. Terracotta does not stretch. SO using the cracked first pot for parts, I made some improvements on the new new one.

You can use the same damper but don’t drill a hole for the stupid thermometer since you have a fancy ass digital one now.
sm4  sm6

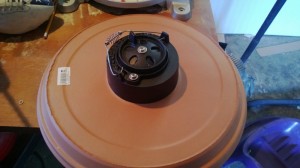
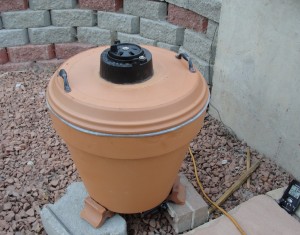
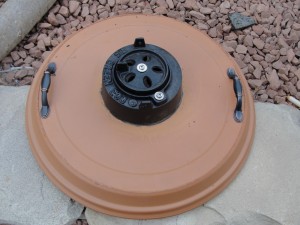
Run down to Home depot and get some little handles that are tall enough you can get your fingers under without touching the lid. Drill 1/4 holes for the bolts, use some washers under the lid to make sure the holes are covered and stick them in place with some lock washers.
sm7

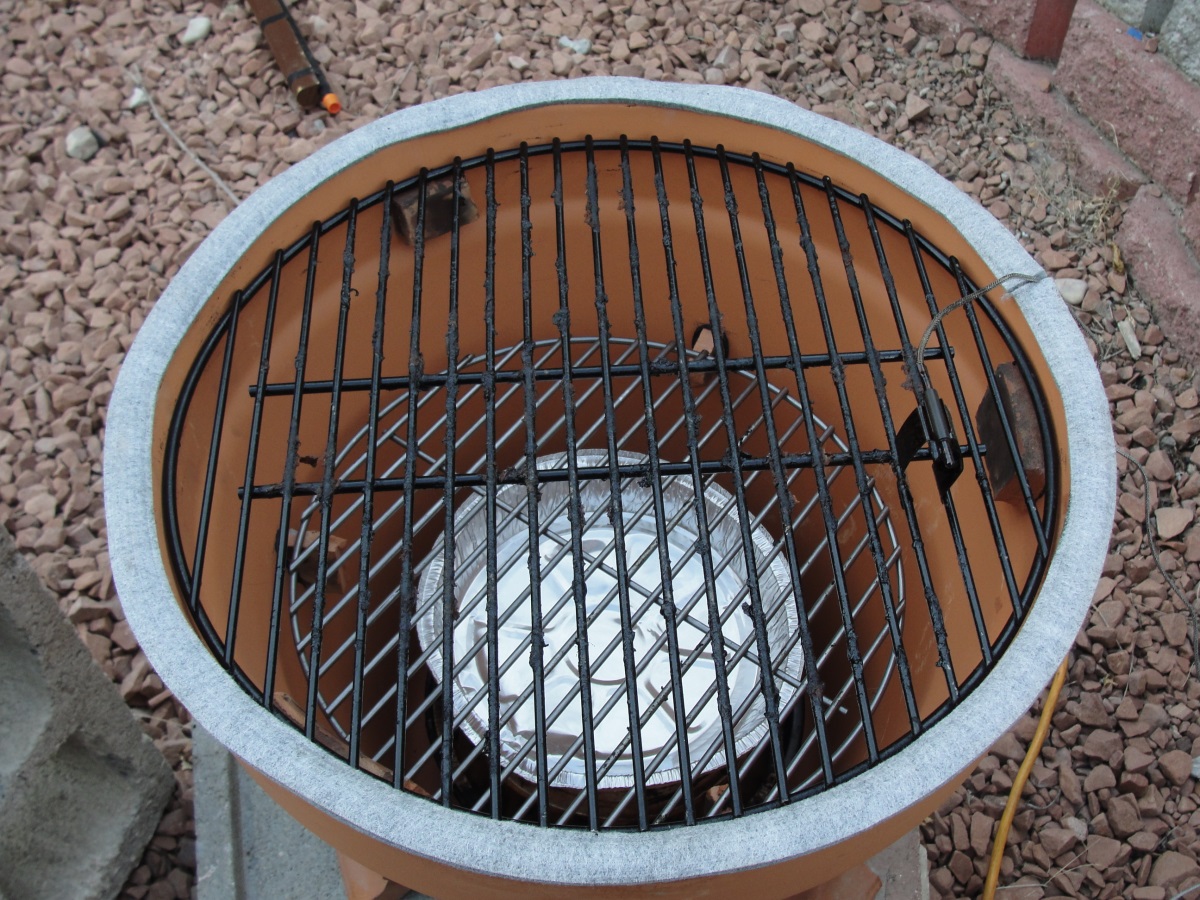
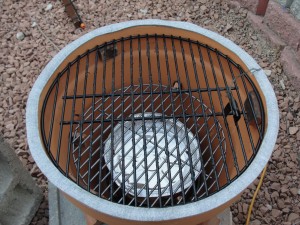
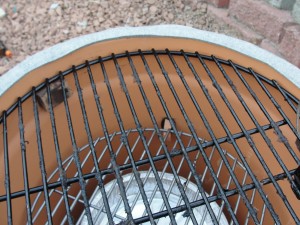
Next is the pot. So now that I destroyed one pot by wedging a grate into it and applying heat until the grate expanded and cracked my pot, I used the pieces to make little feet for the inner walls. They hold the grill a little higher so it has a gap between it and the pot for expansion. Just use some of that great furnace cement to glue them into place so the grate has some gap around the edge. I made a bottom grate holder out of some of the broken pieces too. You can fit a decent brisket on it while stuff is smoking on the top rack. Make sure the grate is above your chip pan, diffuser and drip catcher, mark the height and glue the pieces in place. Give the furnace cement a full day to cure. Add a strip of that nifty Nomex felt to the rim to help it seal.

DSC02162
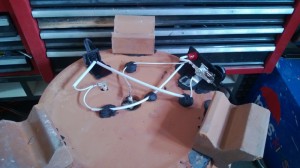
I used the same wiring that I used on the first pot.  I cemented that and the little metal face for the light and knob into place. I used globs of furnace cement to hold the wiring in place so they wouldn’t droop,  touch each other or the pot and let it all setup overnight. The globs cure rock hard in about 24 hours. Furnace cement is my new favorite thing. The problem is all the home repair places call it seasonal because it’s for fixing furnaces. This is stupid because it’s for fixing BBQs too. Tell that new college grad working the customer service desk to go look in the seasonal storage area and they will find it with the snow shovels and ice melter.  It is meant to repair leaks  in furnaces  but it glues metal, stone and plastic to each other like a champ. Perfect for many busted BBQ seam or element holder or diffuser bracket repairs.
Again, I’m sure this wiring  is not UL approved.
sm3

Pot, lid and new grates ready for action!

sm1

sm8


How to make a terracotta smoker DIY style

I guess wife’s never going to get me one of those big green egg smokers. Not even for my birthday.  I was googling around for a cheaper substitute and stumbled across Alton Brown’s terracotta smoker and couldn’t get to the hardware store fast enough.

The concept is similar to the many Kamado smokers out there. It’s a clay smoker that holds heat and smokes food and this ghetto-fabulous version can be made for about $75 but a better version for a little more money is at this link

Here’s the list of stuff you will need for the cheap version:

The hardest part is finding two pots that match up to hold in the smoke. A common combo is a big terracotta pot and something like an azalea pot which is short and wide for the lid, or a saucer. I found a perfectly matching saucer used to sit under a pot and it fit nice and fine on the 18″ pot from the garden center.  I bought one of those Big Green Egg dampers form the local BGE dealer instead of the flat damper. The weber 17″ grate fits right above the lip near the top of the pot. There’s room under the 17″ grate for a 15″ grate if I want to do some double-decker smoking.

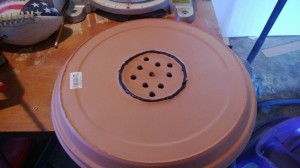
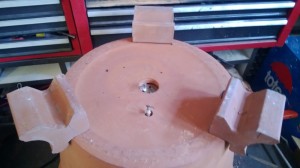
I started with the lid. Drilled a bunch of 1/2″ holes and as luck would have it, the ring on the lid matched up perfectly with the BGE damper.  I cemented it into place with the furnace cement.  A plain flat damper can just go on with a nut and bolt through a drilled hole. If you are really cheap, a rock over a hole would probably work fine.
sm4  sm6
I added the thermometer and cemented it into place too. Make sure not to get a thermometer that extends below the bottom plane of the lid or you will wind up setting the lid on something and breaking it.

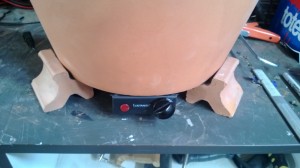
Next I drilled one extra hole in the bottom of the main pot for one of the legs of the element. I furnace cemented the element and its little drip pan into the bottom of the pot and positioned it so the legs of the element did not touch the pot.   I also glued the little pot feet into place. You can also just use bricks to keep the pot off the ground but I wanted something that stayed attached when I moved the pot around and protected the wiring.
sm7

The hot plate I bought had a little light and adjustment knob and I wanted to retain all of that. I didn’t want the whole hot plate in the pot because I wanted access to the controller, didn’t want to melt the plastic plate assembly and wanted the the lower element height to allow for a lower second grilling grate in the pot. I cut the a/c line mounting area so it left a little tab I could cement to the pot. I cemented that and the little metal face for the light and knob into place. I used globs of furnace cement to hold the wiring in place so they wouldn’t droop,  touch each other or the pot and let it all setup overnight. The globs cure rock hard in about 24 hours. Did i mentioned Furnace cement is my new favorite thing? It is meant to repair leaks  in furnaces or BBQs but it glues metal, stone and plastic to each other like a champ.
I’m sure this wiring  is not UL approved.
sm3

Flipped over, looks acceptable.
sm2

So as a test I fired it up with a pie plate of chips on the element and tested it out to make sure it would smolder the chips, hold heat at smoking level, not burn the house down or trip any breakers.
sm1

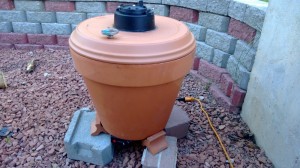
So far so good! it warmed right up to 250 on the low side of the medium setting and the relay cycles appropriately. The chips started smoking and while the inside is holding at 250, the outside is only very warm to the touch. My bratlets won’t burn their skin if they touch it while cooking. The lid and damper don’t leak! I will add handles to make removing the lid easier.

I will make up a little pie plate drip pan and possibly add a lower vent hole and cook something this weekend!

Great little hot sauce recipe cookbook!

It’s that time of year again, got the pepper sprouts planted and the BBQ fired up and I came across a great manly little cookbook featuring heat!

First of all I was impressed when the pictures of peppers showed jalapenos the proper color: RED! Whether  you are a true pepperhead or budding fan of hot peppers and sauces, this is a great all-around cookbook. It has a good amount of chile history, regional information and sectioned off into different types of sauces, chilmoles and other great hot food. What I also love about the book is it definitely follows my mantra of cooking simply with fresh ingredients. Food doesn’thave to have 50 ingredients or take hours to prep, it just has to be good.

I’ve started off with the chile verde and Mexican shrimp cocktail so far and they were both spot-on delicious! I’ll feature some of the food here for sure!